Workflow
The Workflow is the component that enables the construction of one’s own Data Science & Machine Learning pipeline.
Workflow Management
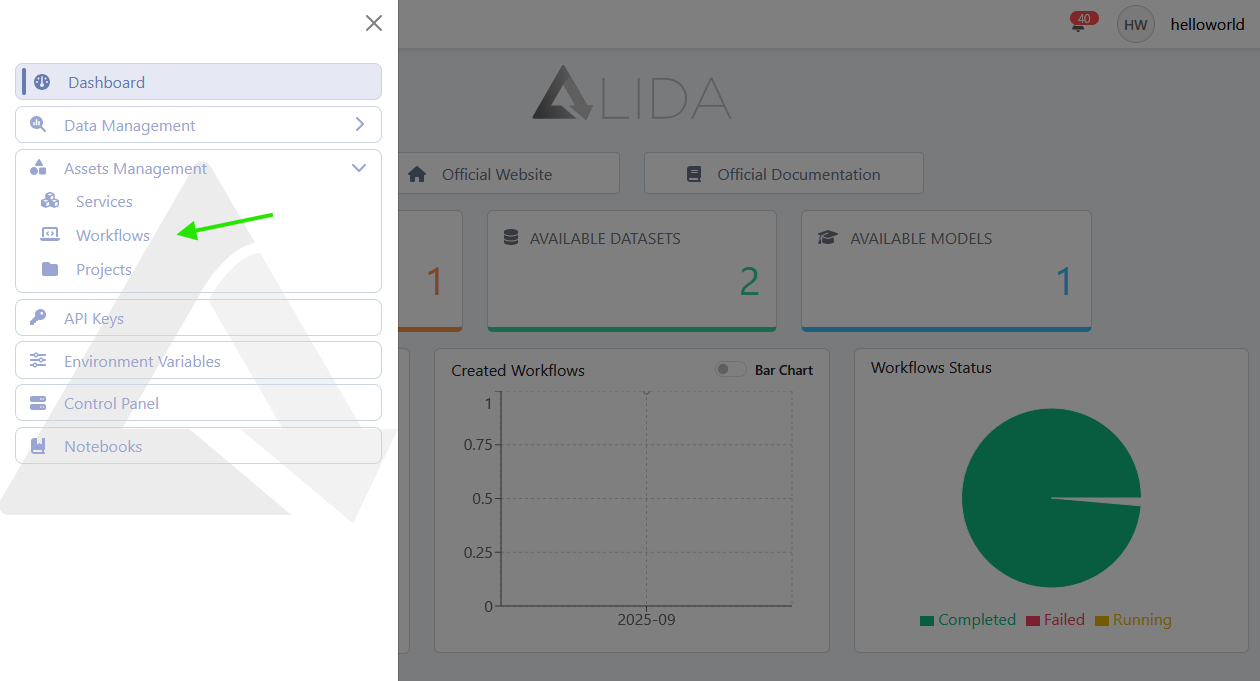
To access the Workflow Management screen, use the side menu:

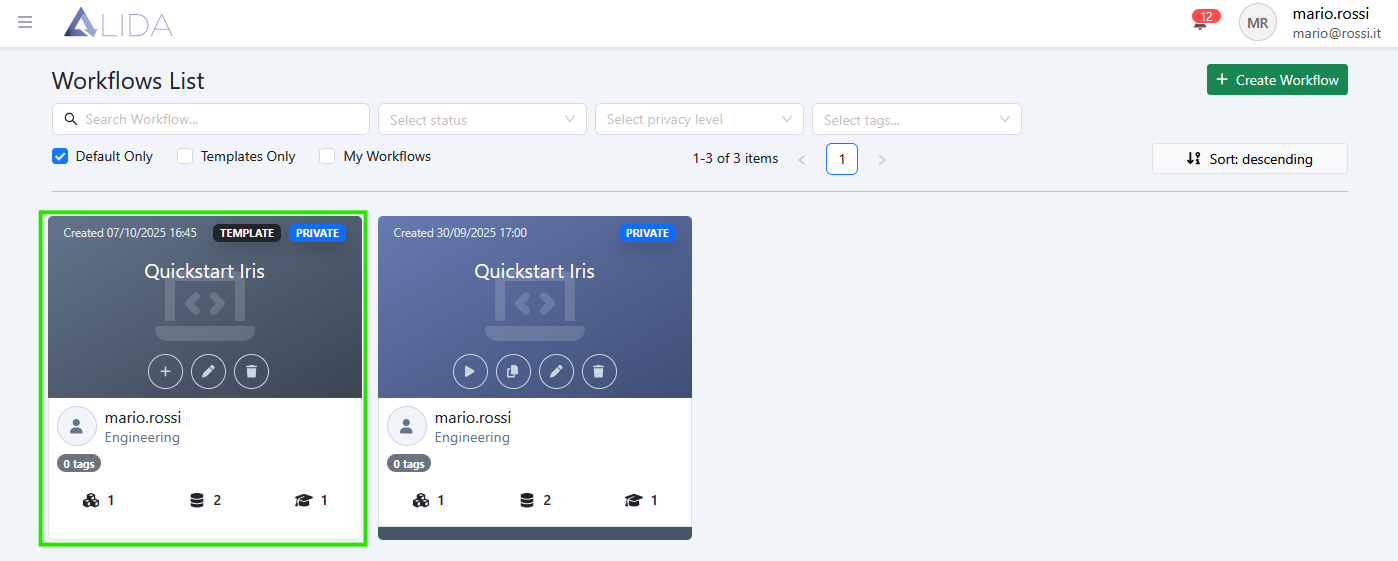
Viewing Workflows
From the Workflow management page you can view public workflows, team-owned workflows, and your private workflows.
For each workflow, the following functions are available:
| Function | Button |
|---|---|
| Execute | |
| Create Template | |
| Edit | |
| Delete |
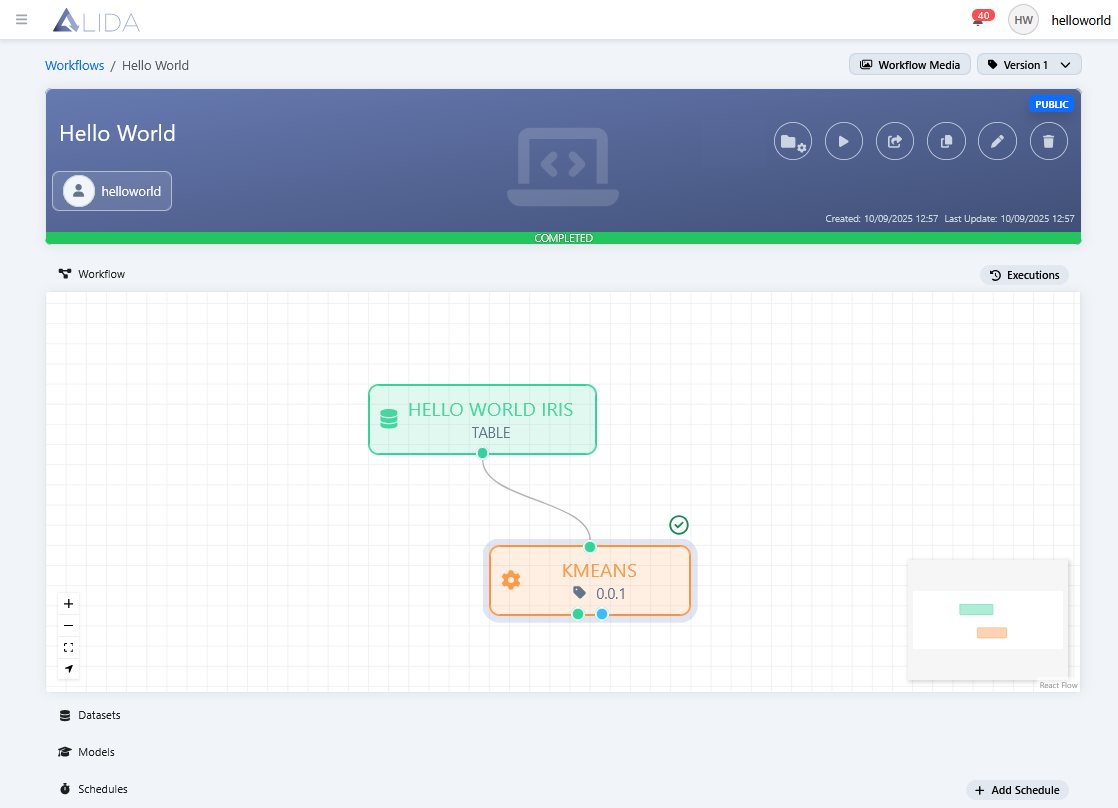
Clicking on the workflow card itself will instead open the Workflow detail panel.
In the upper right corner, additional functions are available:

Such as:
| Function | Button |
|---|---|
| View media content generated by the Workflow’s Services |  |
| Select Workflow version |  |
| Add Workflow to a Project | |
| Export Workflow |
On the same page, at the bottom, the following collapsible sections are also available:
- Workflow: to interact with the Workflow’s components
- Datasets: to view the list of input and output datasets together with a preview (
 )
)

- Models: to view the list of input and output models, and to download them (
 )
)

- Schedules: to configure and view the workflow execution schedules

The following sections describe in greater detail the above-mentioned functionalities.
Workflow Media (Multimedia Content)
By clicking on , the screen displaying the multimedia content created by the Workflow’s service components will open (see also the section Service – Workflow Media).
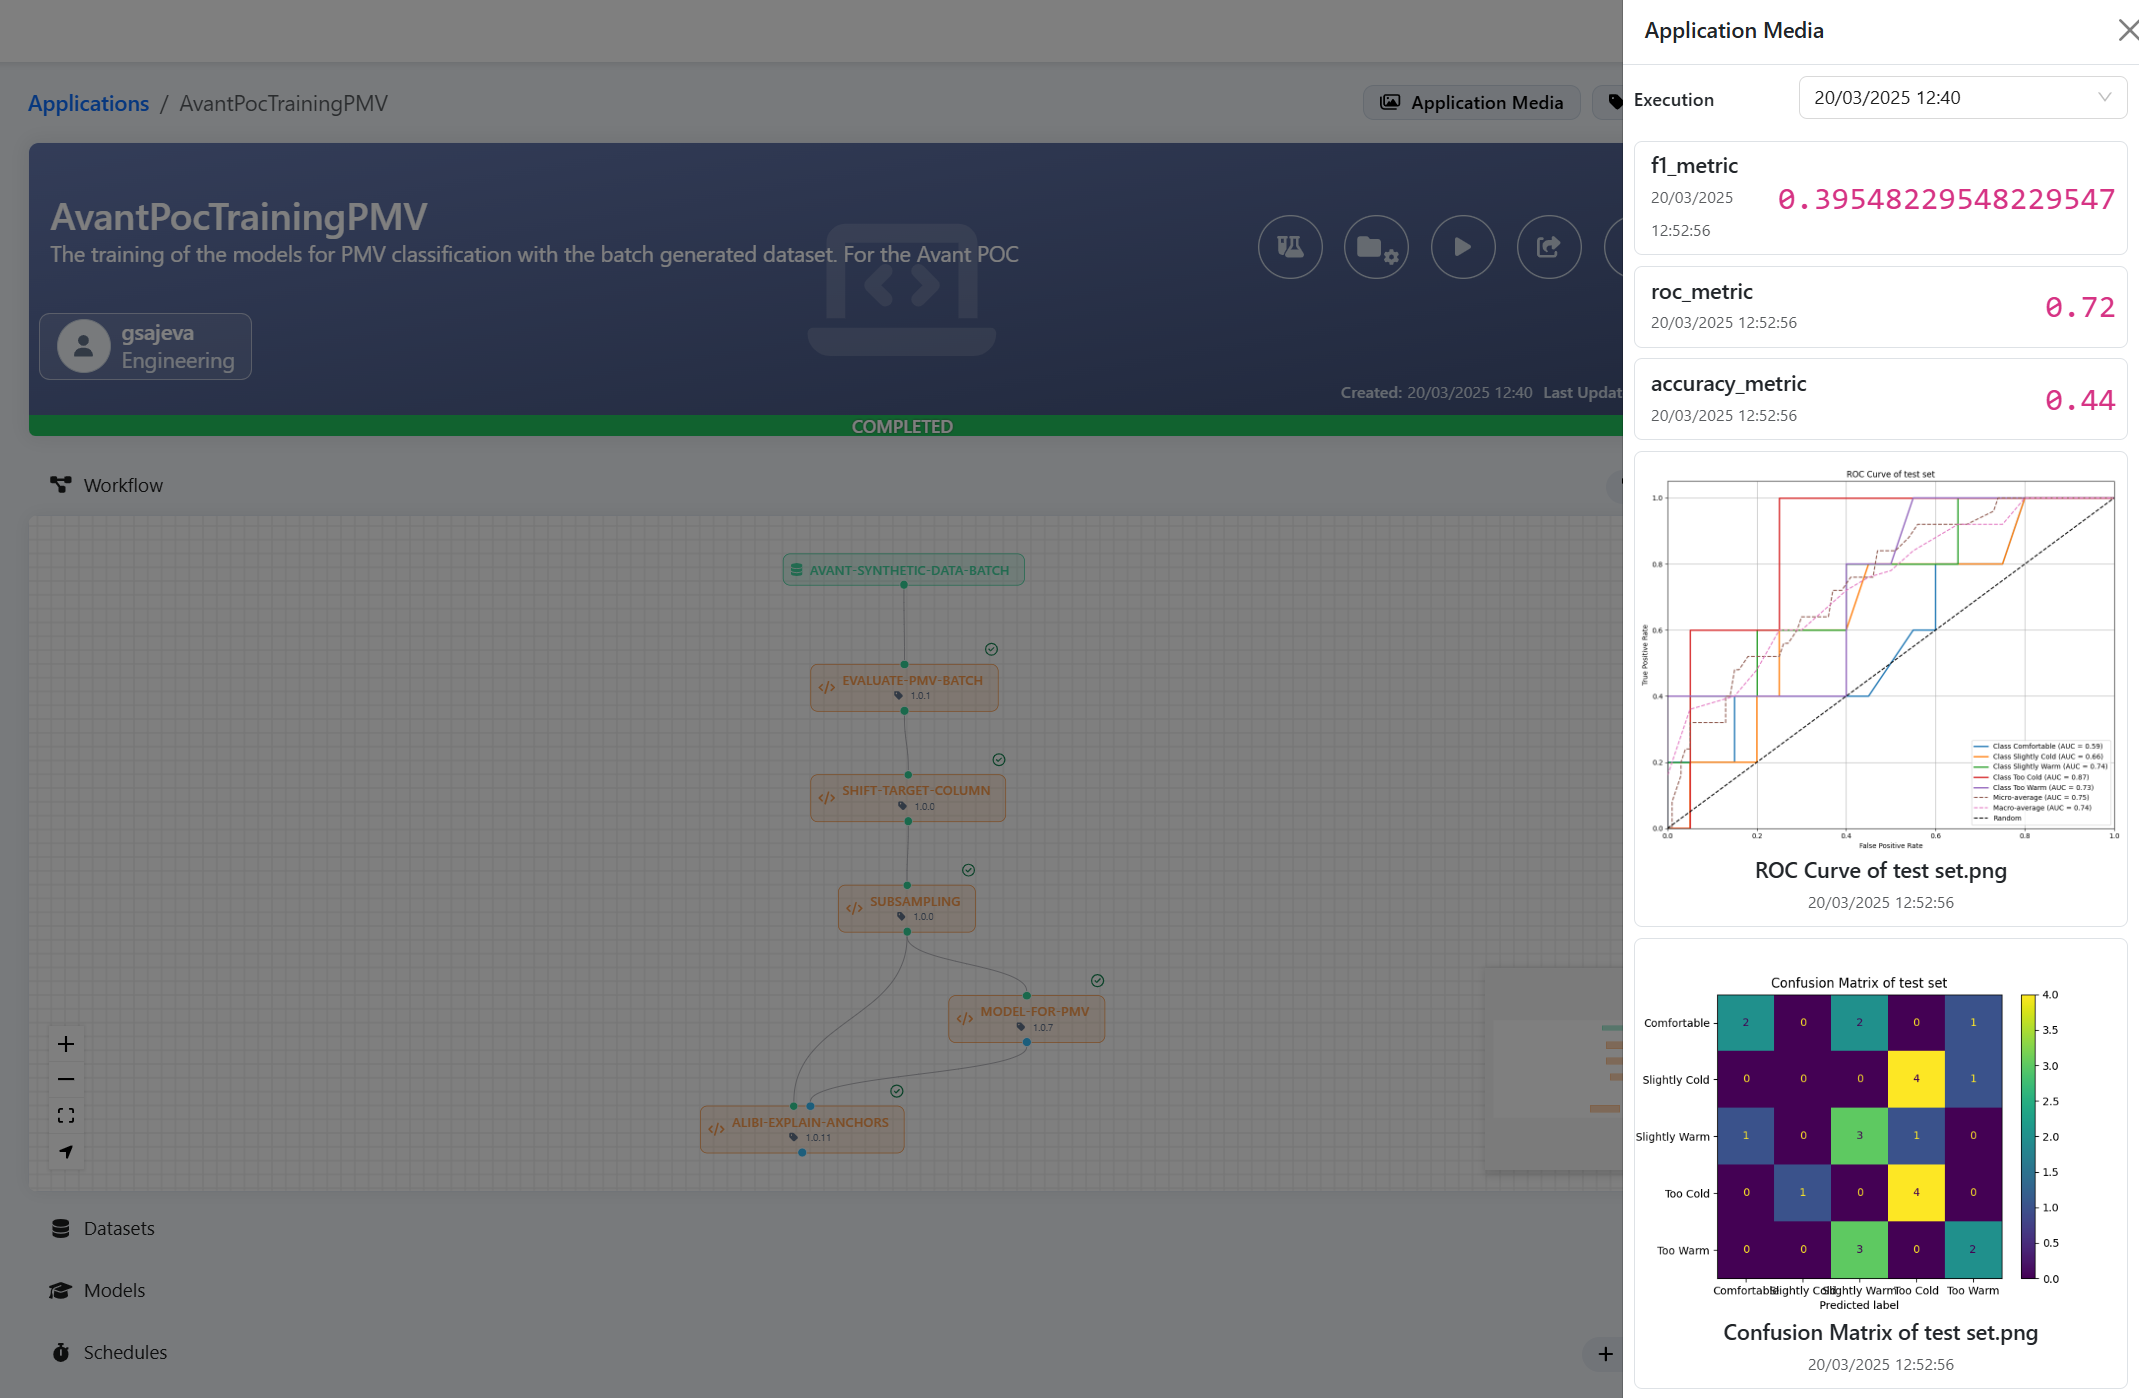
From here you will be able to:
- View the multimedia content generated by each Service
- Select the specific execution run for which you want to view the content
Version Selection
Under development …
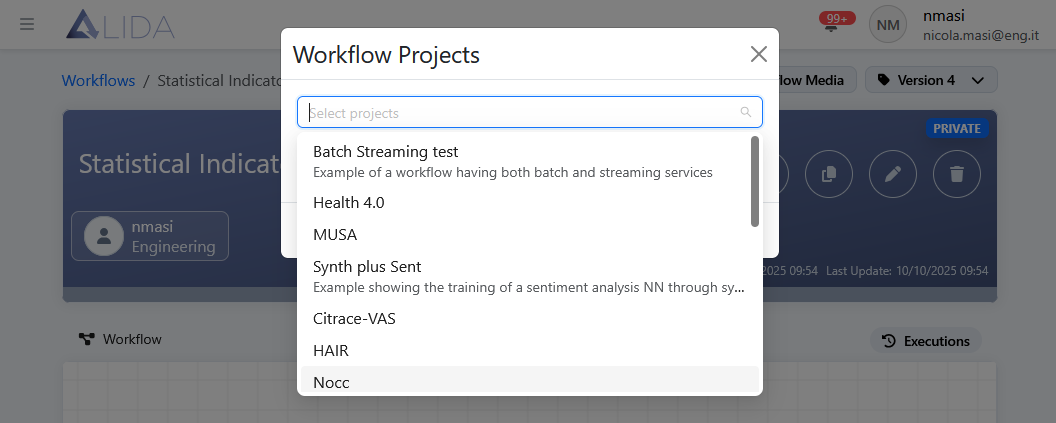
Add to a Project
By clicking on ![]() , a dialog opens that allows you to add the Workflow to a Project.
, a dialog opens that allows you to add the Workflow to a Project.
The available Projects are those previously created via the dedicated section (Asset -> Projects).
Export
By clicking on ![]() , it becomes possible to export the Workflow in different formats:
, it becomes possible to export the Workflow in different formats:
- Standalone
- Manifest
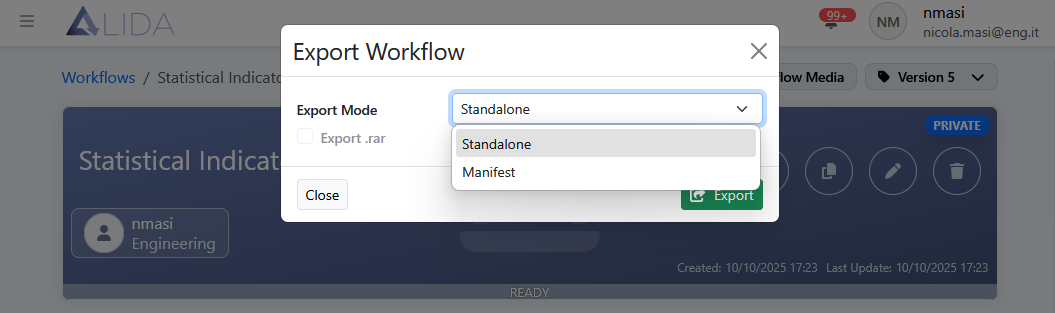
By selecting the Standalone mode you can download a Docker Compose stack implementing the Workflow and designed for execution locally or on systems outside the Data Analytics System platform.
Selecting the Manifest mode allows you to download the equivalent Kubernetes version in JSON manifest format.
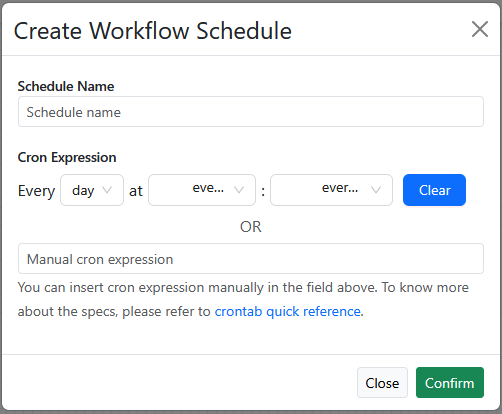
Scheduling
In the Schedules section it is possible to schedule the Workflow execution using Cron expressions.
Creating a Workflow
- For instructions on creating a Workflow, see the paragraph Create Workflow in the Quickstart section.
- For the capabilities available in the Workflow Designer, refer to the Designer Overview.
In this section we will illustrate some additional functions useful during the creation and modification of a Workflow.
We will use the Workflow created during the Quickstart as a reference.
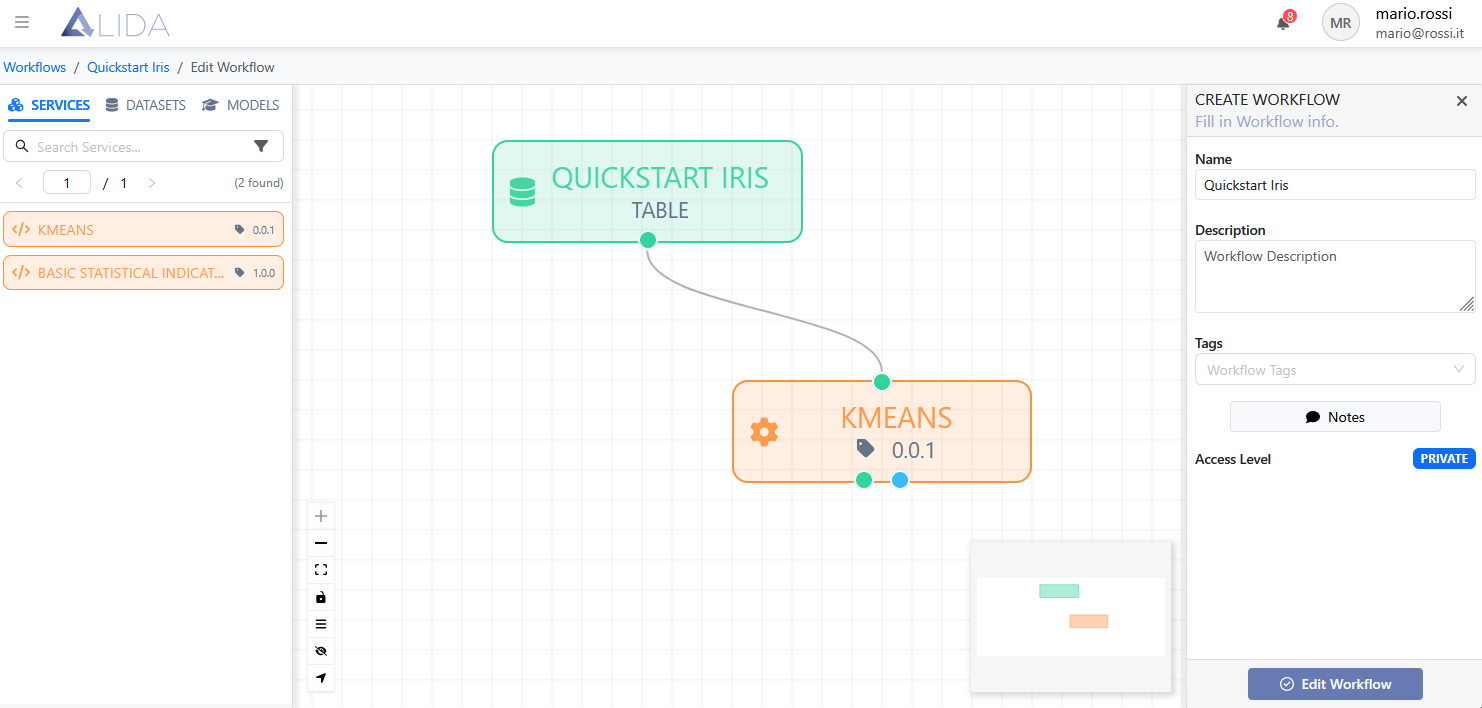
Initial Settings
Immediately after clicking the Create Workflow button, the following settings form opens:
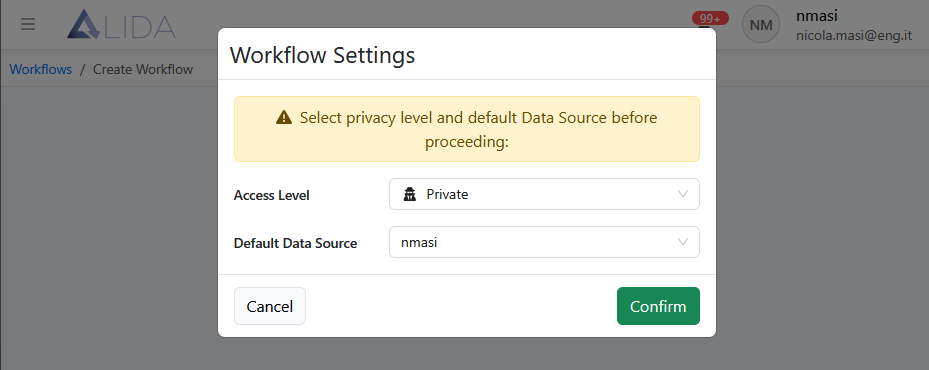
This form contains the following fields:
- Access Level
- Default Data Source
Access Level determines the visibility level of the Workflow asset (as described in the Basic Concepts section).
Default Data Source allows selection of the default DataSource to which all the Workflow’s Services will point for storing results. This default configuration can later be changed for each individual Service within the Workflow Designer (see the I/O Ports Settings section).
General Information
- The Workflow Designer ensures only compatible ports can be connected.
I/O Ports Settings
By clicking on one of the ports of the blocks on the canvas, the Element Details panel opens. Its form content depends not only on the port type but also on the block type (service, dataset, …).
For example, by clicking on the input dataset port of a KMeans Service, one can select — through the relevant checkboxes — which dataset columns are actually passed to the Service.
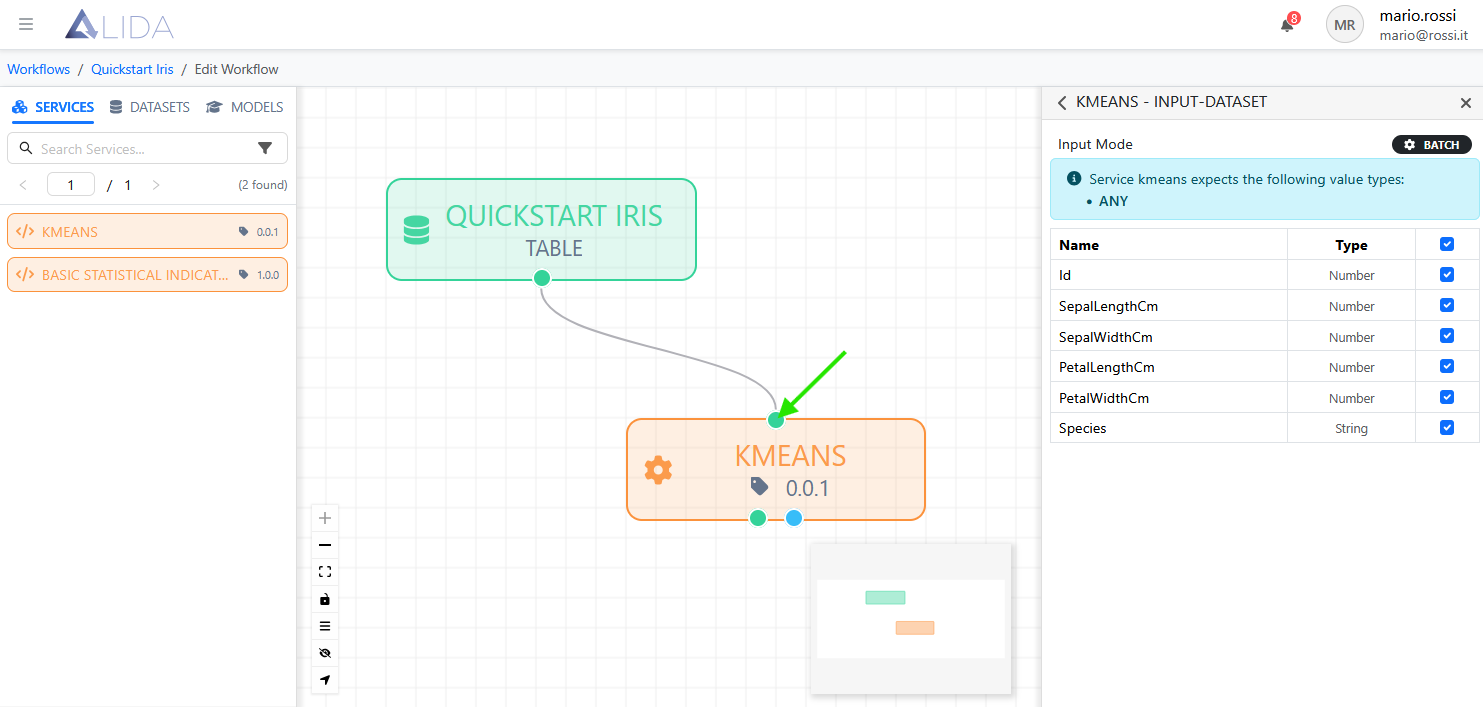
By clicking instead on the output dataset port of the Service, on the right side you can select the destination data source for the output dataset.

Execution Target Selection for Services
For each Service component within a Workflow, it is possible to set a Target.
The Target determines the set of nodes of the Data Analytics System cluster that are candidates to run the assigned Services.
The available Targets must be pre-defined by the system administrator via the Control Panel (see Targets Management).
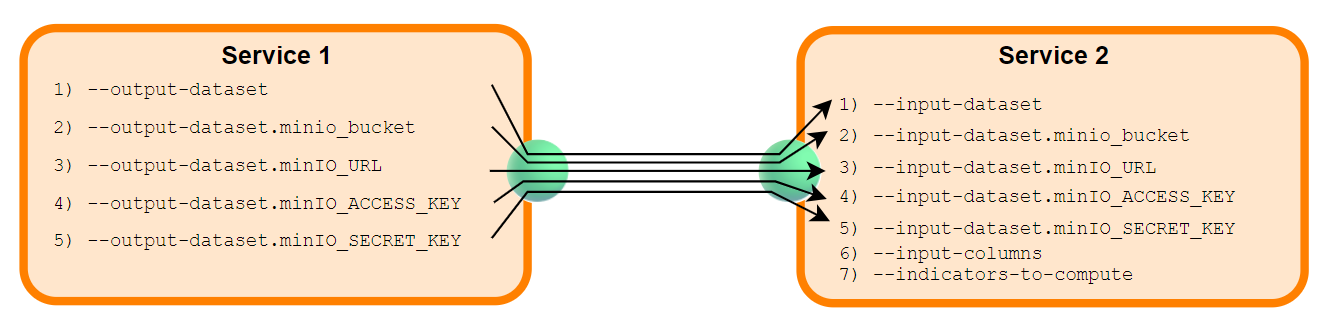
Authomatic Enhancement of Port Parameters
By connecting Service each other, the Data Analytics System will provide to assign the values ai valori (defined in the met-model) the arguments of the output port of a Service to the related input port of the next Service in the Workflow.
Example
Modifying a Workflow
It is possible to modify a Workflow — or quickly modify the properties of a Service it contains — by clicking the Edit Workflow button:
![]()
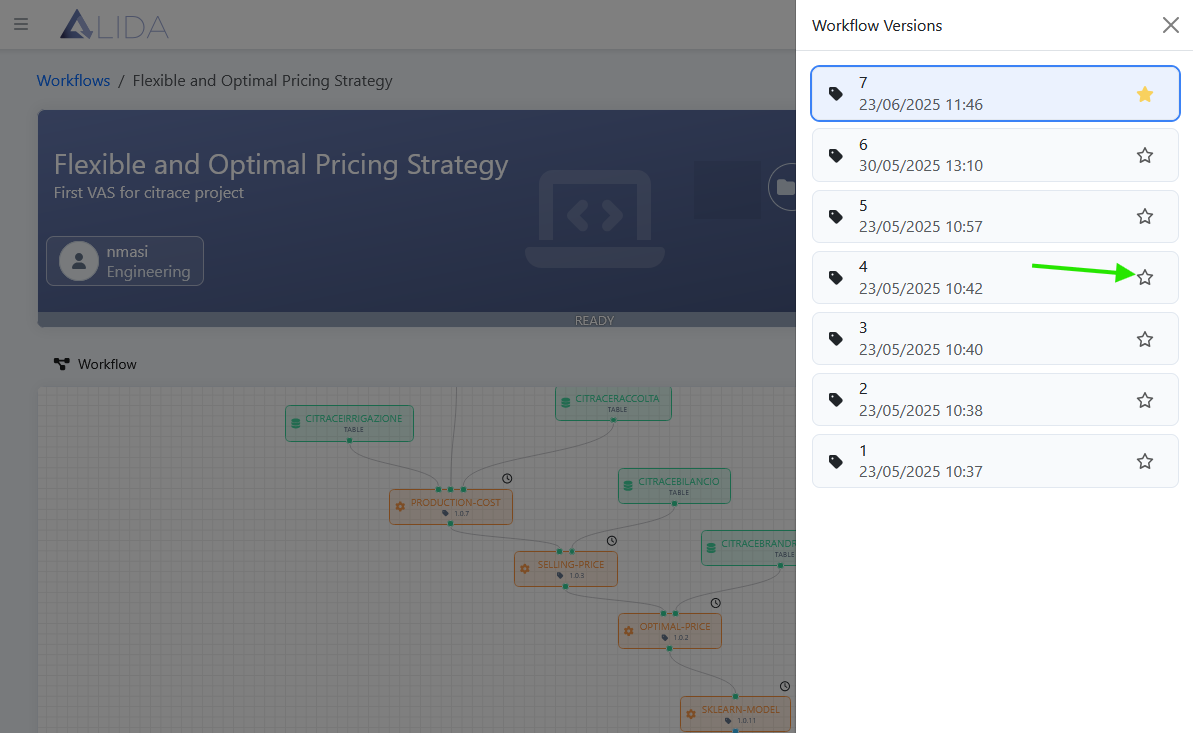
Versioning
Each time a Workflow is modified it is versioned:
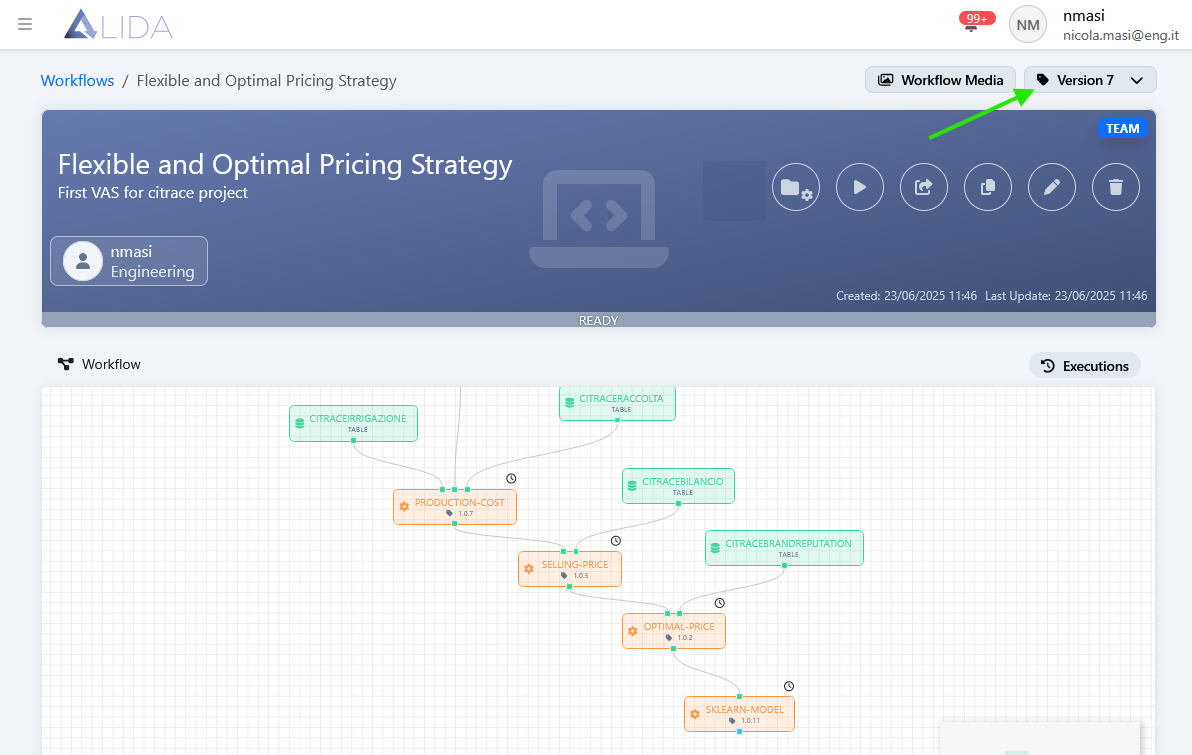
It is possible to designate a previous version as the default:
Executing a Workflow
Once the Workflow has been configured and created, it can be executed or scheduled. If configured, the platform will also send associated notifications about the execution status.
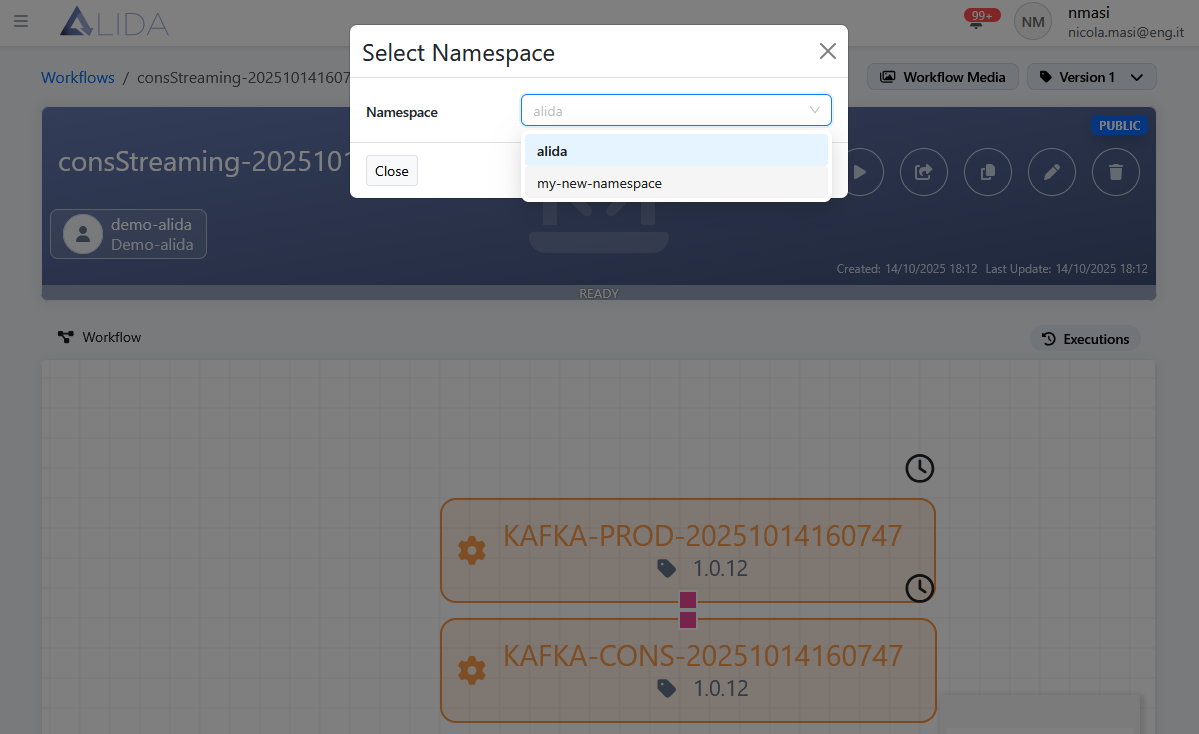
Namespace Selection
By clicking the Execute Workflow button:
![]()
If the system administrator has defined additional namespaces via the Control Panel, a popup will open to allow namespace selection.
Here it is sufficient to know that a namespace refers to a dedicated area of the cluster for workflow execution. Multiple namespaces may differ in terms of security policy, available compute resources and more (consult your system administrator for more information).
Possible Workflow States
READY: The Workflow has just been created and is ready for executionSTARTING: The Workflow is initializing. Resources are being allocatedRUNNING: The Workflow is currently executingCOMPLETED: The Workflow execution has completed. Results are availableSTOPPED: The Workflow has been manually stopped by the userERROR: The Workflow was interrupted due to an error
Logs of Workflow Services
From the detail page of a Workflow that has been executed or is running, it is possible to access the logs of individual Service components that have passed the initialization stage (STARTING state).
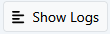
By clicking the Show Logs button:
The log viewing panel opens:
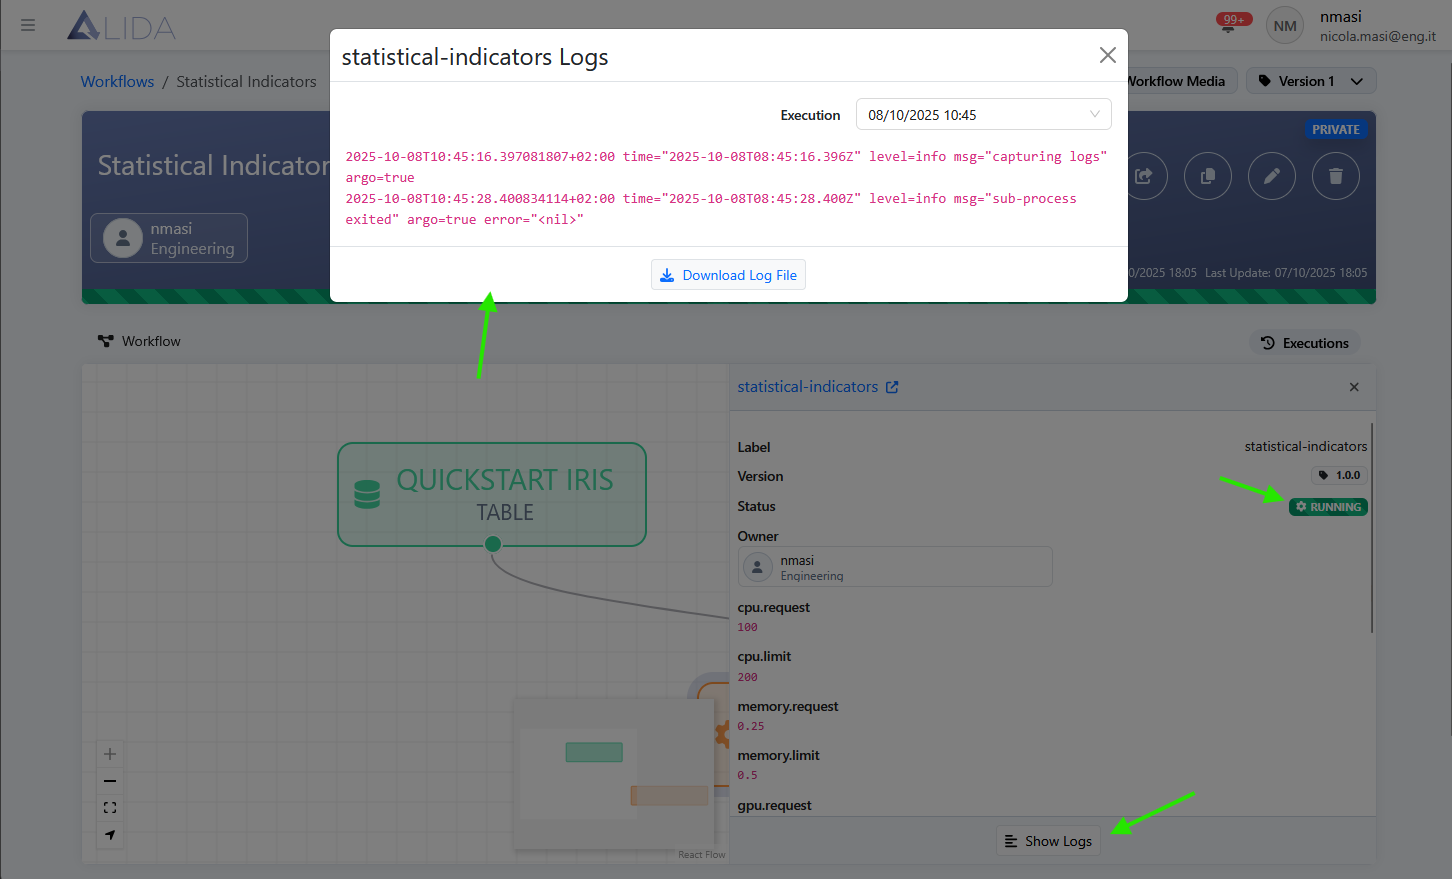
By clicking the Download Log Files button:
You can also download a local copy of the log files.
Deleting a Workflow
By clicking the Delete Workflow button:
![]()
It will be possible to remove a Workflow from the catalog.
The system will ask for confirmation:

Creating a Template
By clicking the Create Template from Existing Workflow button:
![]()
A Template will be created:
A Template is a special, non-executable copy of a Workflow available in the catalog as a basis for creating new Workflows. See also Template Management.
Use of MLflow
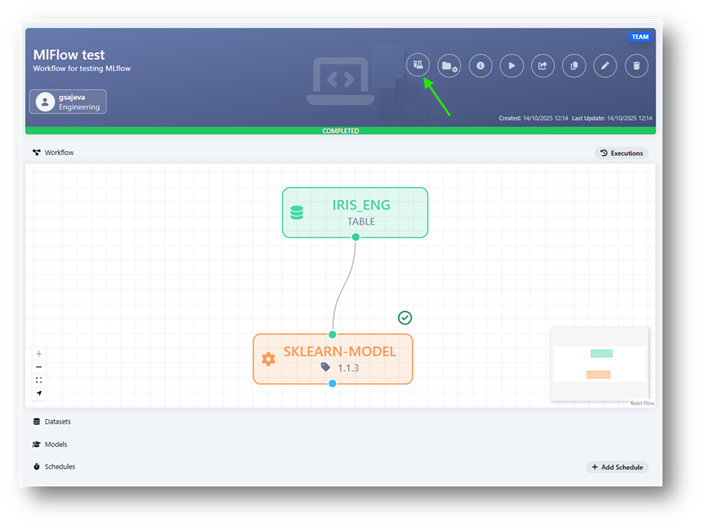
Figure: Workflow Experiment
If a model trained within a Workflow is of FML type, it is possible — via the Experiments button (Figure: Workflow Experiment) — to perform a comparison for algorithm selection, accessing the MLflow tool:
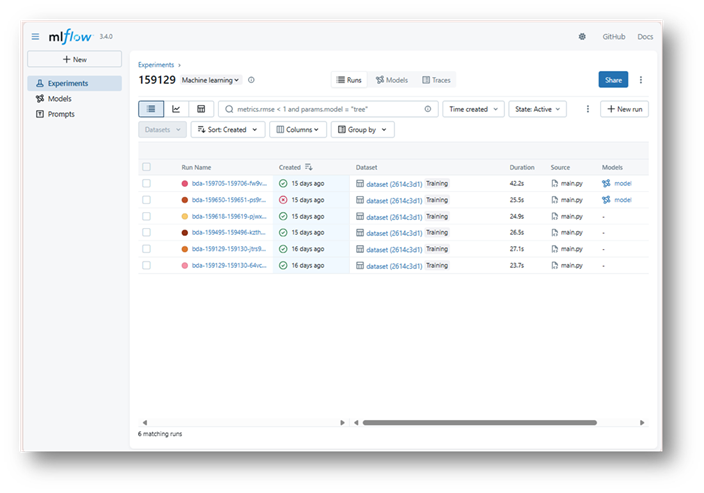
Figure: MLflow Tool